Brandy Snaps

There’s something about snow: it has superpowers. It makes the world go silent.

I’d like to rename these cookies ‘snowstorm snaps’. Not only were they baked during a Sunday morning snowstorm, but they use basic storecupboard ingredients, meaning you can bake them even when snowed in!

IMG_1151

Brandy Snaps
Adapted from Martha Stewart Cookies: The very best treats to bake and to share

½ cup all-purpose flour
½ teaspoon ground ginger
3 tablespoons unsalted butter
¼ cup golden syrup
⅓ cup sugar

Preheat oven to 160°C and line a baking sheet with parchment paper.

In a small bowl, whisk together the flour and ground ginger. Melt the butter in a small saucepan over medium heat. Add the sugar and golden syrup and stir over medium heat until the sugar has dissolved. Remove from heat and stir in the flour mixture.

Drop teaspoons of batter on the prepared baking sheet. These cookies spread a lot, so leave plenty of space between them (more than 5cm). Bake until flat and golden brown, about 10 minutes.

Remove from oven and leave to cool on baking sheet until firm, then transfer to a wire rack and cool completely. You can shape these before they harden if you wish: just wrap them around the handle of a wooden spoon while still flexible to form them into cigars or lay them over an upside down glass or mug to form baskets which you can fill with ice cream or fruit.

Sweet and Salty Cake: The Anti-Diet Cake

January. Month of new resolutions, new beginnings, and official diet month.

Well screw that! Move over diets, I’m giving you three layers of fudgy chocolate cake, each smothered with a layer of salted caramel and a second layer of whipped caramel ganache frosting. Sugar, butter, cream, chocolate. This is the anti-diet cake. If you’re determined, then wait until February to make it. But then again, you could just have a slice instead of lunch, or give up entirely on that diet… Come on, I know you want to.

IMG_1040

The salted caramel and sprinkling of sea salt is a perfect match to the rich chocolate, and it works beautifully. Try it. If the recipe looks like a little much to tackle all at once, I suggest making the salted caramel and the chocolate layers on one day and doing the frosting and assemebling on another day. You can easily freeze the cake layers and store the salted caramel in the fridge in an airtight container.

IMG_1017

On a side note: Thanks to all the new people who have stopped by Sugar Cubed recently! It’s nice to know I’m not just talking to myself!  Will you be breaking you January diets?

IMG_1057

Sweet and Salty Cake

Adapted from Baked: New Frontiers in Baking, by Matt Lewis and Renato Poliafito

For the classic chocolate cake layers

¾ cup dark unsweetened cocoa powder
1 ¼ cups hot water
2/3 cup sour cream
2 2/3 cups all-purpose flour
2 teaspoons baking powder
1 teaspoon baking soda
½ teaspoon salt
¾ cup unsalted butter, softened
½ cup vegetable shortening (or margarine)
1 ½ cups granulated sugar
1 cup firmly packed brown sugar
3 large eggs, at room temperature
1 tablespoon pure vanilla extract

For the salted caramel

½ cup heavy cream*
1 teaspoon fleur de sel
1 cup sugar
2 tablespoons light corn syrup**
¼ cup sour cream

For the whipped caramel ganache frosting

450g dark chocolate (60-70% cacao), chopped
1 ½ cups heavy cream*
1 cup sugar
2 tablespoons light corn syrup**
2 cups unsalted butter, soft but cool, cut into 2cm pieces

To assemble the cake

2 teaspoons fleur de sel, plus more for garnish

If you’re in the UK

*Heavy cream = double cream
**Light corn syrup = golden syrup

Make the classic chocolate layers

Preheat the oven to 325°F (160°C). Butter and flour three 8-inch (20cm) round cake pans, line the bottoms with parchment paper.

In a medium bowl, combine the cocoa powder, hot water, and sour cream and set aside to cool.

Sift the flour, baking powder, baking soda, and salt together into a medium bowl and set aside.

In a large bowl, beat the butter and the shortening on medium speed until ribbonlike, about 5 minutes.  Add the sugars and beat until light and fluffy, about 5 minutes. Add the eggs, one at a time, beating well after each addition, then add the vanilla and beat until incorporated. Scrape down the bowl and mix again for 30 seconds.

Add the flour mixture, alternating with the cocoa mixture, in three additions, beginning and ending with the flour mixture.

Divide the batter among the prepared plans and smooth the tops. Bake for 35 minutes to 40 minutes, until a toothpick inserted in the centre of each cake comes out clean. Transfer the cakes to a wire rack and let cool for 20 minutes. Invert the cakes onto a wire rack, remove pans, and let cool completely. Remove the parchment.

Make the salted caramel

In a small saucepan, combine the heavy cream and fleur de sel. Bring to a simmer over very low heat until the salt is dissolved.

Meanwhile, keeping a close eye on the cream mixture so it doesn’t burn, in a medium saucepan combine ¼ cup water, the sugar, and corn syrup, stirring them together carefully so you don’t splash the sides of the pan. Cook over medium-high heat until a candy thermometer reads 350°F (176°C), or until the mixture is dark amber in colour, 6-8 minutes. Be careful not to burn the caramel, as I did this the first time round! Remove from the heat and let cool for 1 minute.

Add the cream mixture to the sugar mixture. Whisk in the sour cream. Let the caramel cool to room temperature, then transfer to an airtight container and refrigerate until you are ready to assemble the cake.

Make the whipped caramel ganache frosting

Put the chocolate in a large heatproof bowl and set aside.

In a small saucepan, bring the cream to a simmer over very low heat.

Meanwhile, keeping a close eye on the cream mixture so it doesn’t burn, in a medium saucepan combine ¼ cup water, the sugar, and corn syrup, stirring them together carefully so you don’t splash the sides of the pan. Cook over medium-high heat until a candy thermometer reads 350°F (176°C), or until the mixture is dark amber in colour, 6-8 minutes. Remove from the heat and let cool for 1 minute.

Add the cream to the caramel and stir to combine. Stir slowly for 2 minutes, then pour the caramel over the chocolate. Let the caramel and chocolate sit for 1 minute, then, starting in the centre of the bowl, and working your way out to the edges, slowly stir the chocolate and caramel mixture in a circle until the chocolate is completely melted. Let the mixture cool.

Using an electric whisk or mixer, beat on low speed until the bowl feels cool to the touch. Increase the speed to medium-high and gradually add the butter, beating until thoroughly incorporated. Scrape down the bowl and beat on high until the mixture is fluffy.

Assemble the cake

Place one cake layer on a serving platter. Spread ¼ cup of the caramel over the top. Let the caramel soak into the cake, then spread ¾ cup of the ganache frosting over the caramel. Sprinkle 1 teaspoon of fleur de sel over the frosting, then top with the second cake layer. Spread with caramel, then frosting, and sprinkle with fleur de sel. Then top with the third layer. Spread with caramel. Crumb coat the cake (i.e. cover the whole cake with a very thin layer of ganache) and put the cake in the refrigerator for 15 minutes to firm up the frosting. Frost the sides and top with the remaining frosting. Garnish with a sprinkle of fleur de sel.

This cake will keep at room temperature for about 3 days. If your room is not cool, keep in the fridge for up to 3 days. Remove the cake from the fridge and let sit at room temperature for at least 2 hours before serving.

Conquering the Scone

Scones are easy, right? Most kids can bake them. I couldn’t.

For some reason every time I’ve tried to bake scones in the past, it has been a complete disaster. They always came out hard and dry or cakey. The texture was never right. I had pretty much given up and resigned myself to a life devoid of homemade scones until a miracle happened, and these came out of the oven.

I think buttermilk in this recipe helps keep them flakey and moist, and the trick seems to be to handle the dough as little as possible.

IMG_0933

IMG_0936

Buttermilk Scones
Makes 6 scones

225g self-raising flour
40g sugar
75g butter, at room temperature
1 medium egg, at room temperature
4 tablespoons buttermilk*
pinch of salt
1/3 cup raisins

*If you don’t have buttermilk, use 4 tablespoons of milk and add a few drops of lemon or cider/white wine vinegar. Let sit at room temperature for 5 minutes and use.

Preheat oven to 220°C and line a baking tray with baking paper.

Sift the flour and the salt into a bowl. Add the butter and rub it into the flour using your fingertips until everything resembles breadcrumbs. Add the sugar and raisins and mix well.

In a smaller bowl, beat the egg with 2 tablespoons of buttermilk. Add to the flour mixture and mix with a wooden spoon until everything begins to come together. Finish mixing with your hands, but work the dough as little as possible. If the mixture seems a bit too dry, add just enough buttermilk to bring everything together, one tablespoon at a time. As soon as the mixture comes together, form into a ball and transfer to a lightly floured surface. Pat down to about 2.5cm thickness and cut using a round cookie cutter. Do not twist the cookie cutter when bringing it up as this will prevent the scones from rising in the oven.

Place the scones on a baking sheet and lightly brush them with the remaining buttermilk.

Bake for 15 minutes, or until golden brown.

Best eaten on the same day. Can be frozen.

IMG_0926

Petits Ecoliers

I’ve become a hardcore cyclist. Well, if you’re picturing Tour de France, scrap that. My version is piling on as many layers of clothes and waterproofs as I own and braving the snow in my cornflower blue town bike. Yes, it snowed here this week, and instead of walking and taking a little longer to get to work, I slept those extra five minutes and took the trusty bike. Luckily the snow didn’t stick to the road this time.

Anyways. Petits Ecoliers. They’re a very popular biscuit in France, and literally mean ‘small schoolchildren’ (which sounds creepy in English but I assure you, in French it sounds normal). I used to have them all the time as an after-school snack. The base is a simple and not-too-sweet ‘petit beurre’ biscuit, and it is topped with a generous layer of chocolate. I like calling these biscuits, as opposed to cookies, because to me they are so far removed from the typical American cookie. Crisp, square, not-too-sweet, and subtle. The epitome of Frenchness.

nb. The biscuit base was easy to make, and turned out really crisp. I think it would make a great tart crust, and plan to try it out soon!

IMG_0896

Recipe from here and here .

Makes about 25 biscuits.

Biscuit Base

250g flour
100g sugar
100g butter
62.5g water
½ tsp salt
¾ tsp baking powder

In a small pan, bring the butter, water, salt and sugar to a boil.

Leave to cool, stirring occasionally so that the butter does not harden on the surface. Cool until it has the consistency of a light custard.

In a large bowl, combine the flour and baking powder. Pour the cooled butter mixture into the flour mixture, and stir using a wooden spoon. Do not over-mix, stop mixing as soon as a smooth dough is formed. Cover with dish cloth and leave to rest in the fridge for a minimum of three hours (can be left overnight).

Pre-heat oven to 170°C

Remove dough from fridge and roll between two pieces of greaseproof paper until it is about 3mm thick. Use a cookie cutter to cut the biscuits out. Place them on a baking sheet lined with parchment paper and bake 10-15 minutes (until edges begin to turn a light golden brown).

Remove them to a wire rack to cool.

Chocolate Topping

200g milk chocolate (can be replaced by dark or white chocolate if you prefer)

Break half of the chocolate up into even pieces. Place in microwave-proof bowl. Place bowl in microwave and heat on medium setting, checking every few seconds that the chocolate is not fully melted.  When it is mostly melted but a few lumps still remain, take the bowl out and stir until all lumps disappear. Leave to cool for about ten minutes so the chocolate thickens a bit. Put into a piping bag with 2mm nozzle and pipe borders on the cooled biscuits.

Break up the other half of the chocolate and repeat as above. This time, do not wait for the chocolate to cool and thicken. Immediately spoon into centre of biscuits using a small teaspoon. The borders previously piped will prevent the chocolate from leaking over the sides. Leave half an hour for the chocolate to set.

If desired, sift icing sugar over the top of a stencil to decorate.

IMG_0906

Bala de Coco (Coconut Candy)

In Brazil, most families who can afford to have live in help who help with the cooking, cleaning, and taking care of the kids. More often than not, these employees become part of the family, and affectionate ties form. Picture the heart-warming moments in The Help sans racism.

My grandmother’s cook was called Celina. Sadly, she has now retired, but she has known me my whole life, and I consider her my ‘second grandmother’.  Whenever we went back to Brazil on holiday, my sister and I would stay at my grandmother’s house. I remember going into Celina’s room after lunch to chat and play cards with her, even taking naps in her bed. She was an amazing cook. Lavish lunches, fruit preserves, baking; she did it all, following no recipes, which made it very hard for me to learn from her when I became interested in cooking. I have a few scribbled notes on scraps of paper which I wrote down as she told me how she made certain dishes, but her instructions were always very vague. “Add flour until it looks right” or “cook until you get the right consistency”. She was an intuitive and natural born cook, with years and years of practice.

Although my grandmother had help, she had a few ‘specialties’ which she insisted on making herself for her grandchildren.  There were her Christmas cookies, her chocolate cake, brigadeiros for birthday parties, and these coconut candies.

Image

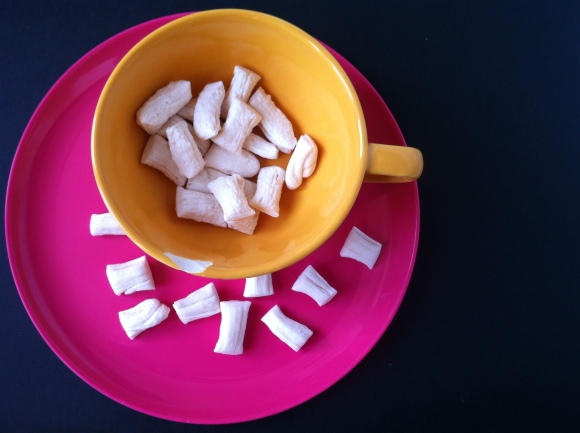
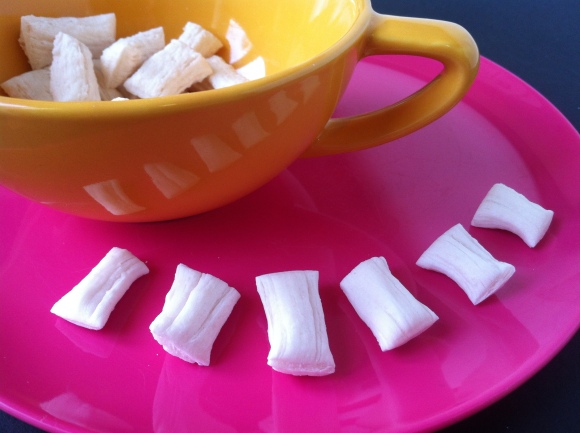
This is not her recipe, but I scoured the internet and found one that produced the exact sweets I remember. Now, this is complicated. The recipe in itself has very few ingredients, but there are a couple of critical points at which all can go wrong. I should have ended up with about 80 candies, but I only managed to get 25 as I messed up one of these steps. First, all ingredients are boiled together, like a caramel, to the hard crack stage (about 150°C, I got to use my candy thermometer for the first time which was very exciting). Then, the mixture is dumped out onto greaseproof paper and left to cool. Once it is cool enough to touch, the candy is ‘pulled’ to aerate it, which turns it from a beige colour to the white you can see in the pictures. This pulling part is the critical point, as the candy can suddenly crystalize, ending up in a powdery mess. This is what happened to most of mine. Before I got to pull it, it was already crystalizing. I did some research and suspect it may have been because: 1. I touched the edges too much, folding them in as they cooled and 2. The air in this country is too damn humid. So my suggestions are: as tempting as it may be, leave the mixture to cool for a while (but not until it goes so hard you can’t pull it, and not so early that you burn yourself, as I did) and well… don’t live in England.

Ingredients

200ml coconut cream
200ml water
1kg sugar

Line two large baking trays with greaseproof paper.

In a medium-sized pan, whisk the coconut cream, water and sugar together until well blended. Cook on medium heat until the mixture begins to bubble, reduce, and turn yellow in colour (about 15 minutes). Insert the thermometer and when the temperature reaches 150°C, remove from heat and immediately divide the mixture between the prepared pans.

Leave to cool (about 15 minutes). When the mixture is cool enough to touch, divide the dough in four and stretch by pulling each end away from each other with your hands. Fold over and repeat the stretching until the candy turns white and striated. Once this is achieved, use scissors to cut into 1cm candies. You will notice the candy gets harder as you stretch, so make sure you cut it while it’s still possible. Leave to dry overnight on greaseproof paper.

*Tips:

  • Start pulling as soon as your hand can bear the heat.
  • Don’t touch the mixture excessively as it cools, as this may cause it to crystallise.
  • If the mixture crystallises, it can be saved! Grind down to a powder, return to pan with 200ml of water and repeat the process.
  • Store in an airtight container. Keeps about a week.

Image

Carrot Cake w/ Cinnamon Mascarpone Icing

I feel like I’m having a quarter-life crisis. And when you don’t know what to do with your life or where you’re going, what better than a little procrastibaking to stop yourself thinking?

This is my favourite carrot cake recipe. I usually make it without the addition of walnuts and raisins, but I thought I would put them in this time to try it out. All in all I think I prefer this plain without the walnuts and the raisins, but I’m generally not a fan of nuts in cakes. This cake is REALLY moist, I think it’s the addition of apple sauce. The most important thing is to finely grate the carrots to get an even and smooth texture which is more cakey than muffiny (does that make sense?).

This icing is the only cream cheese icing I will eat and not scrape off and leave to one side, it’s really light and not overly sweet!

Carrot Cake

2 cups all purpose flour
1 cup granulated sugar
1 cup packed light brown sugar (I used dark brown sugar this time)
1 cup vegetable oil
1 cup apple sauce
4 eggs, room temperature
3 cups finely grated carrots (about 6 medium carrots)
2 teaspoons ground cinnamon
1 teaspoon ground ginger
1/2 teaspoon ground nutmeg
1 teaspoon vanilla essence
1 teaspoon salt
1 cup walnuts (optional)
3/4 cups raisins (optional)

Cinnamon Mascarpone Icing

100g mascarpone (at room temperature)
200g full-fat cream cheese (at room temperature)
100g icing sugar, sifted
1/2 teaspoon cinnamon

Preheat oven to 160°C

Butter and flour two 9-inch round cake pans. Line the bottoms with baking paper.
Finely grate the carrots.
Place the walnuts in a frying pan and lightly toast on medium heat until fragrant and coloured but not burnt (about 5 minutes). Set aside and leave to cool.
Whisk the flour, baking soda, salt, cinnamon, nutmeg, and ginger in a medium sized bowl. Set aside.

In a separate bowl, whisk together the sugars, apple sauce, and oil using an electric whisk. Add the eggs one at a time, whisking after each addition until just blended. Add the flour mixture and stir until blended. Stir in the vanilla and grated carrots.

Set aside 1/4 cup of walnuts. Finely chop the rest and add, along with the raisins.

Divide the batter equally between the two prepared pans. Bake in the middle of the oven for about 1 hour, or until a cake tester inserted into the center of the cakes comes out clean. Cool cakes in the pans for about 10 minutes, then turn onto cooling racks, peel the baking paper off, and cool completely before icing (MAKE SURE you cool completely before icing, I was in a hurry and the icing started melting as I iced the cake!). You can make the icing as the cakes cool.

Cinnamon Mascarpone Icing

Combine all ingredients in a medium sized bowl and whisk with an electric whisk for about 5 minutes, until smooth. Ice the top of one layer, place the second layer on top and ice the top and sides. Decorate with the walnut crunch (recipe below).

Walnut Crunch Decoration

Melt 3 tablespoons of sugar in a small non-stick saucepan. When the sugar has turned a dark amber colour, remove from heat and add the 1/4 cup of reserved walnuts. Stir to coat the walnuts, then tip everything onto a sheet of baking paper and leave to cool (the caramel will harden). Once cooled, roughly chop into a crumbly texture and use to decorate your cake. Adds a really nice crunch to it and is also delicious on it’s own if you leave the walnuts whole!

Mini Lemon Cupcakes

Who knows why but I decided to make lemon curd on a Saturday night. Off I went to buy some lemons, passing students already at the kebab shop, home a little earlier than planned after overdoing it on Halloween weekend. Everyone at the grocery store was buying booze. I got:

3 lemons (1/2 cup lemon juice)
1/2 cup sugar
2 large egg yolks
2 large eggs
1/4 cup butter
a pinch of salt

This was my first time making lemon curd, and it was surprisingly easy. Start by setting a pan full of water over medium heat and bring the water to a good simmer. Squeeze the juice out of the lemons. Then whisk the eggs, egg yolks, sugar, lemon juice and salt in a heat proof bowl that will fit over your pan of simmering water (this is a bain marie). Once you have whisked everything together, cube the butter and throw it in with the mixture. Put your bowl over the simmering water and whisk constantly until the butter melts and the mixture thickens. This will take around 10 minutes of constant whisking! If you lift some mixture up with the whisk and it holds some of its shape when it falls back into the pan it, you’re done!

The result should be smooth, you don’t want scrambled egg in there! You can press the curd through a wire strainer to get rid of any lumps that may have formed (I didn’t do this). Store in an air tight container in the fridge for up to one week.

So after the lemon curd inspiration I needed to use it on something. It’s actually just great on its own by the spoonful… but I remembered some cute mini silicone cupcake holders I had never used before and had been meaning to try out. I used my favourite vanilla cupcake recipe from Magnolia Bakery and piped some lemon curd on each mini cupcake. If I’m honest I think I prefer normal sized cupcakes; for some reason I found it hard to get an even bake on these mini ones and they also seem to dry out quite quickly. But they’re super cute! I’d recommend eating them on the day you bake them.

Vanilla Cupcakes (adapted from Magnolia Bakery’s Vanilla Cupcakes)

1 1/2 cups all-purpose flour
1/2 cup unsalted butter, softened
1 cup sugar
2 medium eggs
1/2 cup milk
1 teaspoon vanilla essence
1 teaspoon baking powder

Preheat oven to 160°C.

Butter 12 silicone mini cupcake holders (or line a mini muffin tin or normal muffin tin with cupcake holders).

In a small bowl, combine the flour, baking powder, and salt. In a large bowl, beat the butter until pale and smooth. Add the sugar and beat for 3 minutes until fluffly. Add the eggs, one at a time, beating well after each addition. Add the dry ingredients in three parts, alternating with the milk and vanilla. With each addition, beat until the ingredients are incorporated but do not overbeat. Spoon batter into prepared cupcake holders, filling them about three-quarters full. Bake for about 20 minutes, or until a cake tester or sharp knife inserted into the centre of the cupcake comes out clean.

Leave the cupcakes to cool. Pipe a dollop of lemon curd on to each cupcake and serve!

Chocolate Chip Cookies

Sugar, flour, butter. It’s amazing to think that these three simple ingredients can come together to create so many different textures and tastes. Cookies, cakes, pastries, pancakes… the variety is incredible.

Image

I guess my love of sugar and everything sweet began at a very young age. For my fourth birthday party, my babysitter made me a castle cake made entirely out of sugar cubes piled on top of each other and stuck together with icing. She decorated it with colourful gummies (which, to me, looked like jewels) and lit candles inside it, making it glow from within. I thought it was the most beautiful thing I had ever seen, and watched over her shoulder (mouth watering) all week as she built it in preparation for my big party. I looked forward to finally tasting my castle all week. But until the cake was brought out and everyone sang happy birthday, it hadn’t occurred to me that no one else would want to eat pure sugar. As I happily broke a chunk of sugar off and bit into it, I looked around and was surprised none of the other kids were fighting to do the same. Who wouldn’t want to eat pure sugar?? Surely that was the epitome of amazingness for anyone with a sweet tooth!

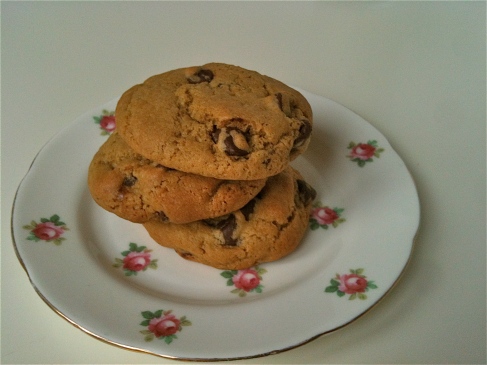
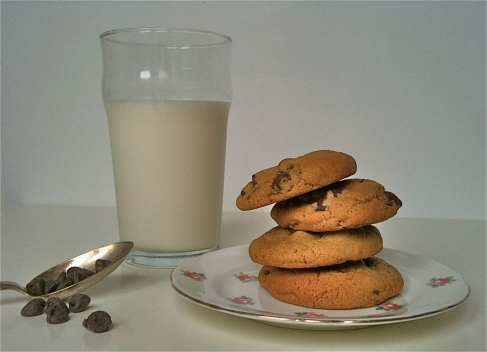
Luckily, my taste buds have developed a bit since then, and I now appreciate more flavours than just SWEET. These cookies are my ultimate chocolate chip cookie. They’re so simple, yet when baked everything combines to form something much greater than the sum of its parts. I don’t think chocolate chip cookies need very much of an introduction. These are nice and chewy, crispy on the outside, and really satisfying with a large glass of milk.

Image

Chocolate Chip Cookies

Adapted from over here and here.

½ cup butter, softened
2 ¼ cups flour
½ teaspoon of salt
1 tsp baking soda
½ cup granulated sugar
1 cup dark brown sugar
1 medium egg
1 medium egg yolk
2 tbsp milk
1 tsp vanilla
1 ½ cups chocolate chips

Cream the butter and sugars. Add the eggs, vanilla and milk. Beat well. Add the flour, baking soda and salt. Beat until incorporated. Stir in the chocolate chips. Refrigerate overnight, or for up to 72 hours.

Pre-heat oven to 160°C. Line baking tray with parchment paper.

Form dough into 2cm wide balls and place on baking tray, leaving enough space in between the cookies for them to expand. Bake for 10 minutes or until edges begin to brown.

Remove from baking sheet and leave on wire rack to cool (or eat while still warm!)

Lemon & Sage Polenta Cake

It turns out I can’t bargain. There must be a bargaining gene of some sort and I most certainly don’t have it. Most people in Cambridge cycle, and, well, when in Rome…

So I’ve decided to buy a bike. I had a day off today and went scouring the second hand bike shops around here. I wanted to get one of those retro Dutch-style bikes with a basket and a comfy seat, but apparently those are in high demand and expensive. I know nothing about bikes, and when I finally found something I liked I tried to bargain with the guy selling it. It was a complete failed attempt, ending up in me leaving, then coming back, then coming back again and still not managing to get the price down. It was all very awkward. I don’t think bargaining is something you can learn. You either have it in you or you don’t. And I don’t. I hope the same can’t be said for photography, as my crappy iPhone attempt at capturing this cake needs a lot of improvement.

Anyway, onto the recipe. Anyone having spent some time in Switzerland will be familiar with Ricola, a Swiss cough drop made of herbs. It seems to me that every Swiss above 50 carries a pack of these around. I remember eating these as sweets. Their herbal flavour is actually quite refreshing, and brings back memories of summer hiking trips in the Alps. I wanted to capture this ‘herbal freshness’ in a loaf cake, and also wanted to experiment with using polenta in a cake, which I had never done before. I was actually really happy with the result. It definitely has that herbal tone to it coming from the sage, but it’s not overpowering. Infusing the butter with sage by browning it really helps with this I think. The polenta gives it a moist crumb which I like, and overall it feels like a simple, rustic cake with a fresh ♥.

Lemon and Sage Polenta Cake

½ cup unsalted butter
1 cup sugar
1 ¼ cup ground almonds
½ cup polenta
¼ cup flour
3 medium eggs
1 tsp. baking powder
Juice and zest of 2 large unwaxed lemons
A pinch of salt
15 sage leaves

Make the sage brown butter: Melt the butter in a small pan over medium heat. When melted and beginning to bubble, add 6-7 sage leaves. Leave to bubble until the butter begins to brown and smell nutty. Remove from heat and leave to cool.
Preheat oven to 160°C
Butter a medium-sized loaf pan. Place sage leaves along the walls of the pan with the top side facing the cake pan. If you have trouble making them stay flat against the pan, spread a small amount of butter on the leaves to help them stick to the pan.
Combine the ground almonds, polenta, flour, baking powder, and salt in a medium sized bowl. Set aside.
Remove the sage leaves from the brown butter and discard (or eat, they’re really crispy and tasty). In a large bowl and using an electric mixer, beat the brown butter and the sugar together for 3 minutes. Add the eggs one at a time, beating well after each addition. Add the lemon zest, lemon juice, and vanilla and blend. Fold in the dry ingredients into the wet mixture until just combined (do not over mix!). Pour the batter into the prepared cake tin and bake for one hour, or until a skewer or a sharp knife inserted into the centre of the cake comes out clean. Remove from oven and cool for 5 minutes before removing from pan and leaving to cool completely.

It starts here!

Welcome to Sugar Cubed.

This blog is an excuse to bake. Having just moved from London to Cambridge for  job as a science geek scanning human brains,  I have found myself with an excess of free time. Having just finished university, I am starting a new phase of my life. Giant metropolis to small town (where, incidentally, I know no one), student to young professional; the most striking difference to my life so far has been that I now have TIME. Not just time to get things done, but free time to myself. When I was a student, there was always an essay to write,  a paper to read, a lecture to prepare for or a dissertation to agonise over. There was always something I could be doing, and when there wasn’t (or even when there was), I had friends to see. There was always SOMETHING I could be doing.

Now, when I leave work, that’s it. As soon as I shut my office door, I can switch off. I’m guessing this isn’t going to last forever. So for now, while I settle in to the sleepy town that Cambridge seems to be and struggle to make friends, I’m going to take advantage of my time for ME and bake.